Supplies
Needed:
Sandpaper
(light grit)
Glue
(we suggest CA+ glue, but any type of resin adhesive, or super glue
will work)
Primer
Flat
Black Spray Paint
Flat
Black Paint
Gloss
Black Paint
Gloss
White Paint
Gloss
Red Paint
Gloss
Green Paint
Silver
Blue, or Dark Gray Spray Paint
Silver
or Aluminum Paint
Matte
Clear Coat Paint
|
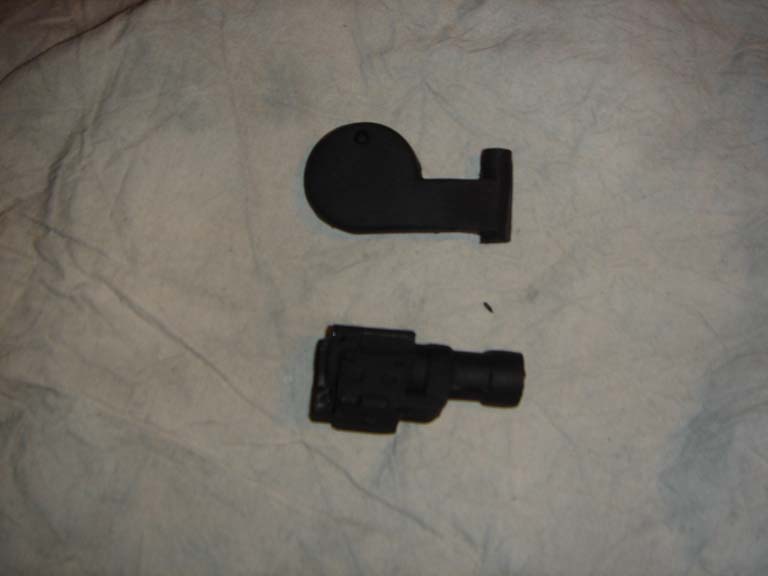
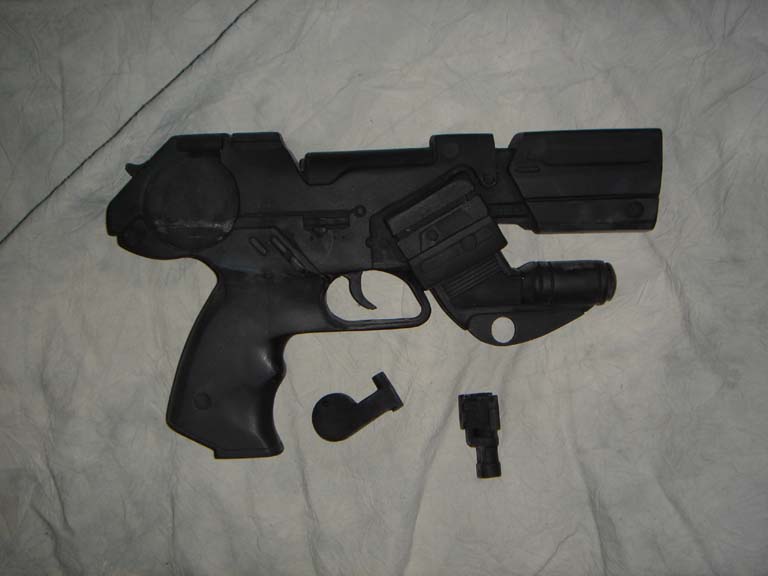
Here's
what you get with the kit. The Main Body, Camera, Disk Arm, and
Mylar Disk. Wash all resin parts in warm, soapy water and let
air dry. |
|
Lightly
sand all resin parts and clean up the seam lines. If there are any
air bubbles or imperfections on the kit, fill with Model Putty and
when dry, sand smooth. Be sure to sand the kit in a well ventilated
area as resin dust may be harmful. |
|
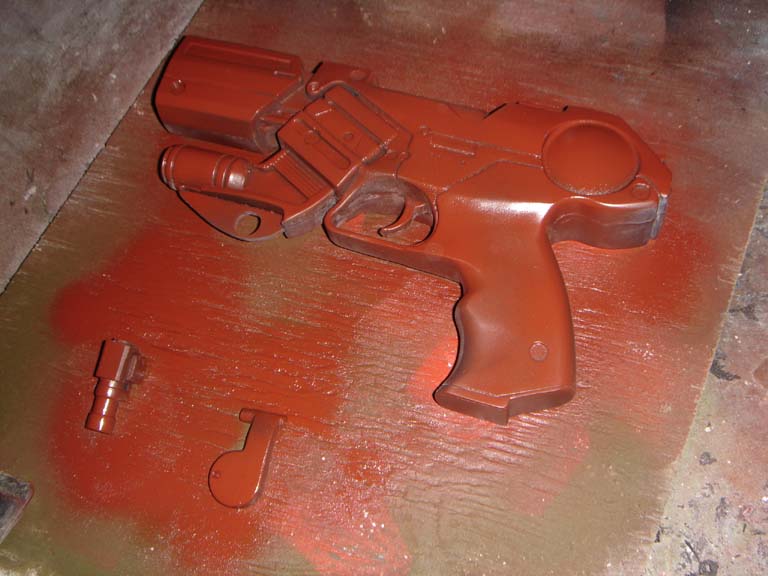
Prime
all parts. Be sure to paint ONLY in a well ventilated area. Allow
paint to thoroughly dry. |
|
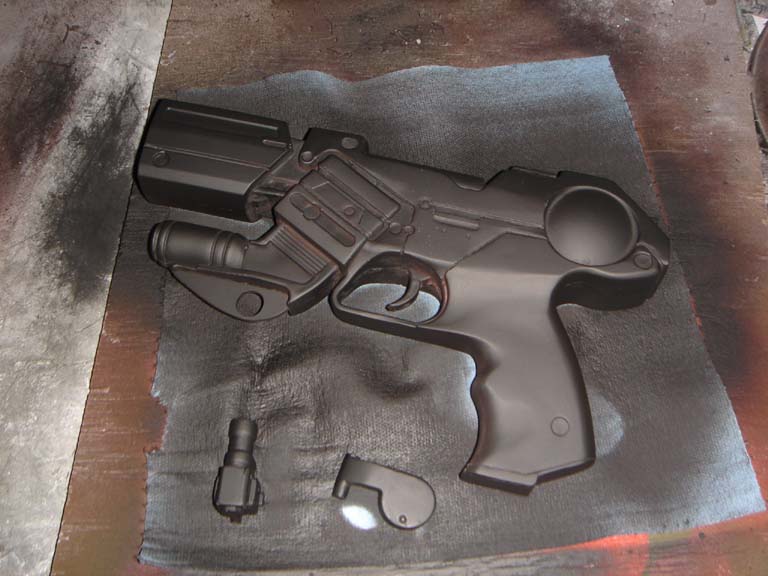
Paint
all parts flat black. Be sure to paint ONLY in a well ventilated
area. Allow paint to thoroughly dry. After it's dried, spray it
with Matte Clear Coat. Be sure to paint ONLY in a well ventilated
area. Allow paint to thoroughly dry. |
|
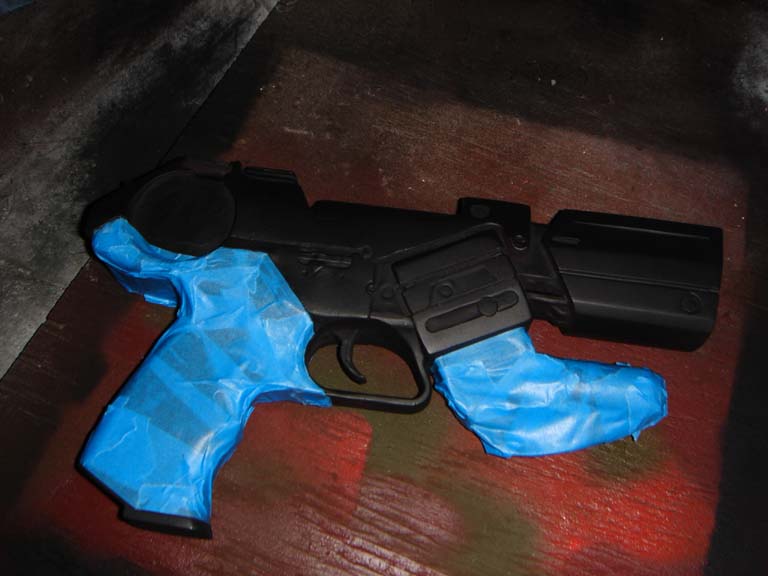
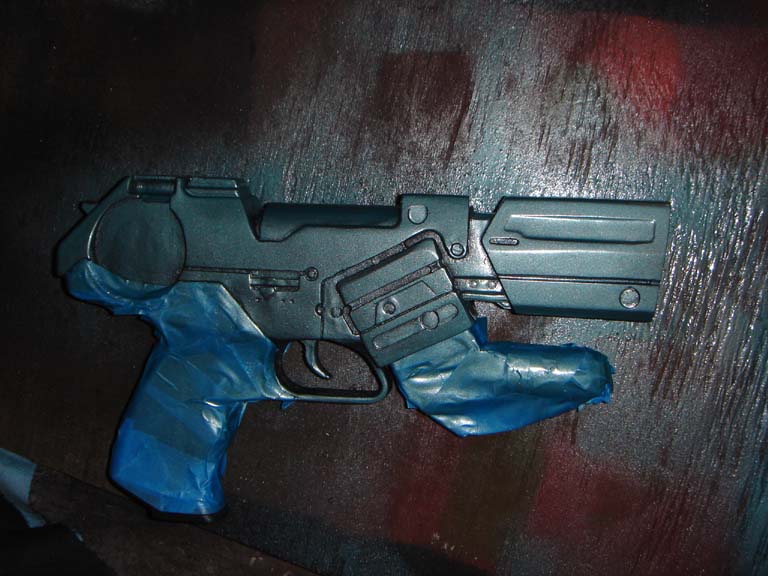
Using
painter's tape, mask the lower body of the gun off. |
|
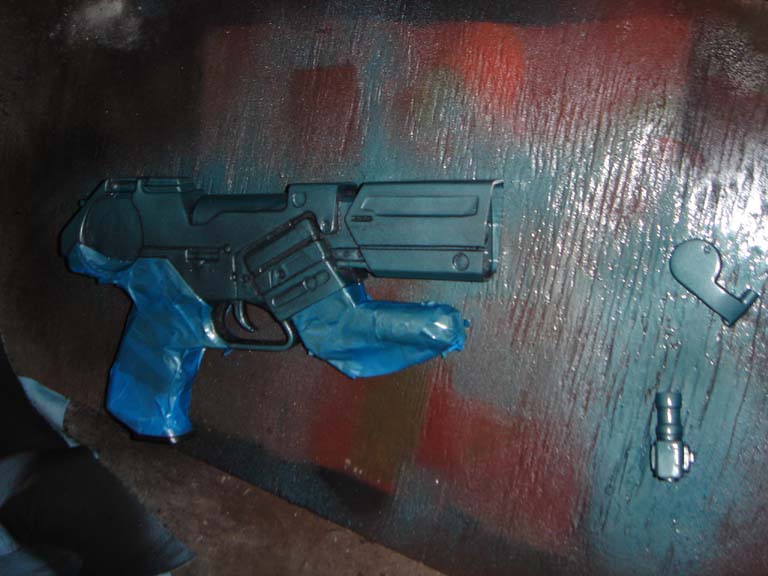
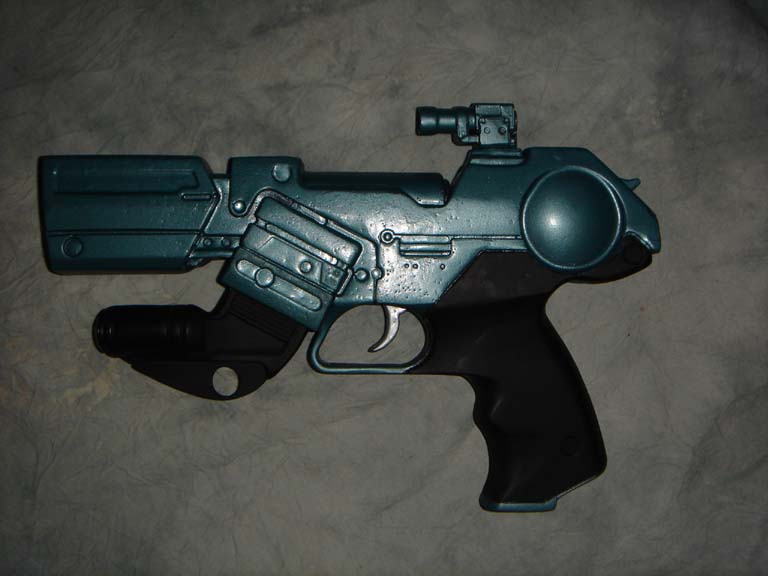
Paint
all parts with Silver Blue, or Dark Gray paint. When checking out
the film, you will see that in the close-up shots, the gun appears
to be Silver Blue, while in the wide shots, it appears to be Dark
Gray. This could be due to different paint jobs on the hero gun
as opposed to the stunt one, or due to different lighting conditions
making the gun appear to be different colors. So decide which way
you want the final prop to look. I decided to go with Silver Blue
and used "Model Master" Silver Blue paint #2901. Be sure
to paint ONLY in a well ventilated area. Allow paint to thoroughly
dry. |
|
Spray
kit with Matte Clear Coat. Be sure to paint ONLY in a well ventilated
area. Allow paint to thoroughly dry. |
|
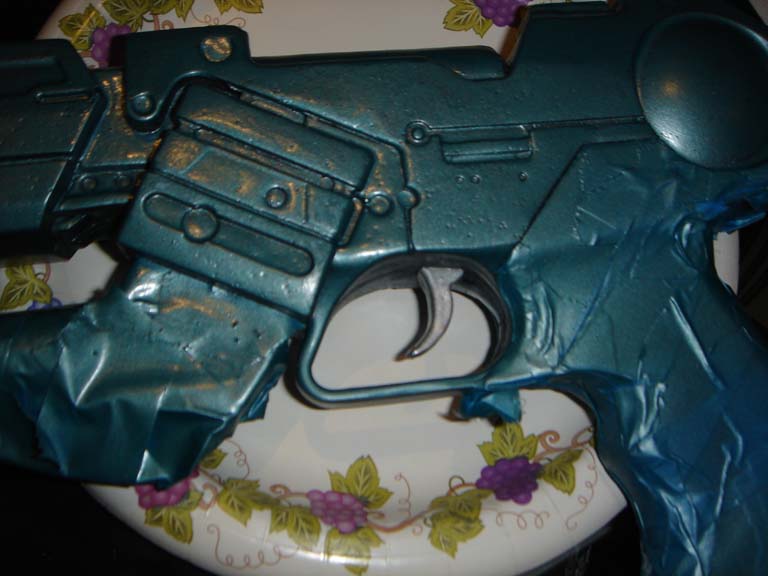
Paint
the trigger Silver or Aluminum. |
|
Remove
masking tape. |
|
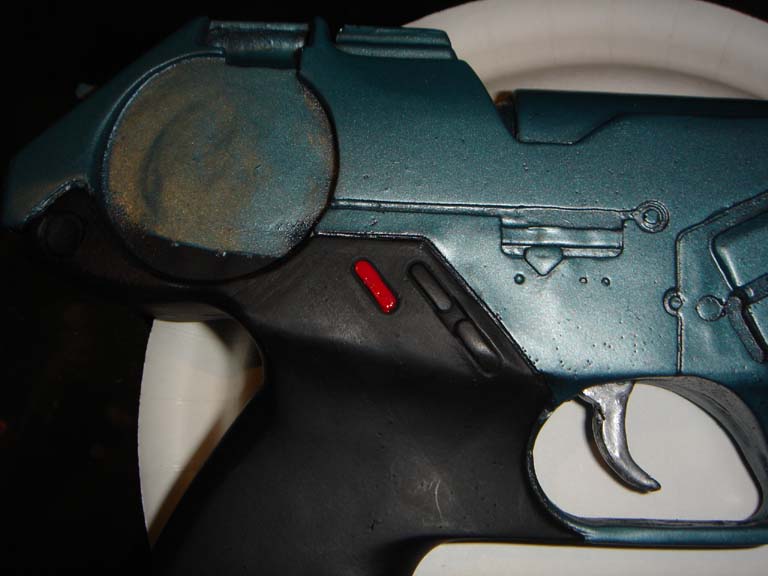
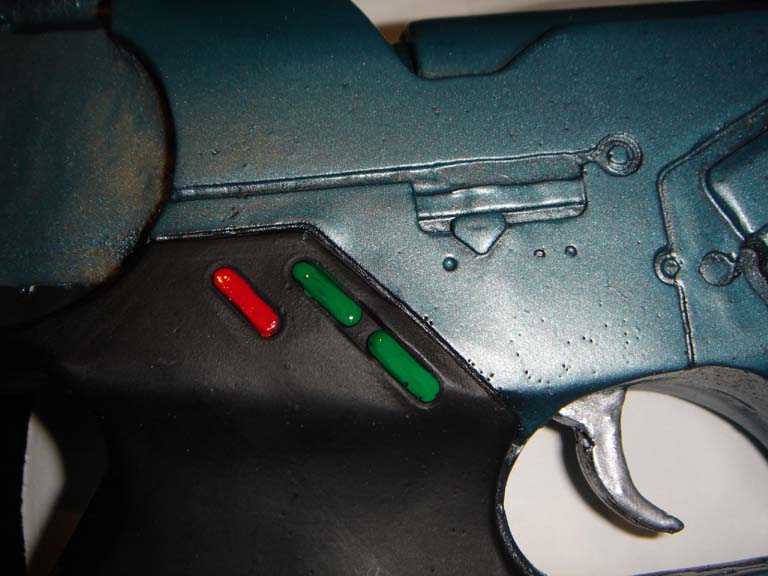
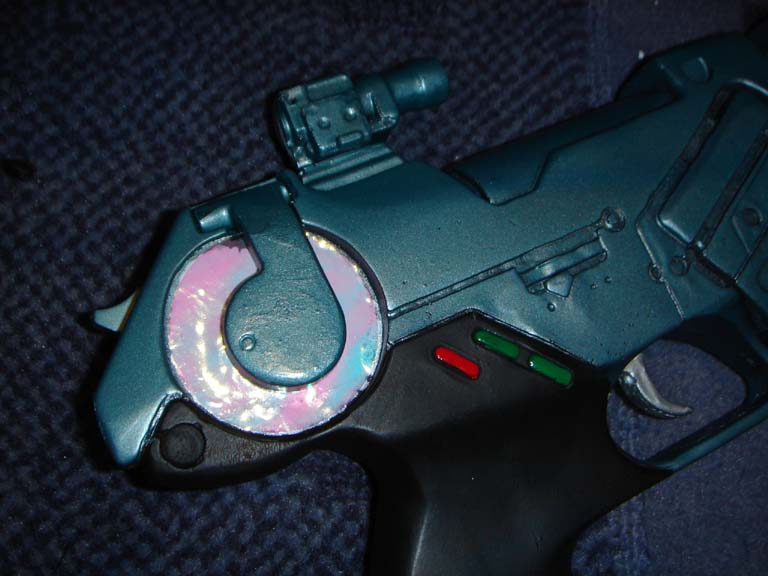
Paint
this button Red. |
|
Paint
these buttons Green. |
|
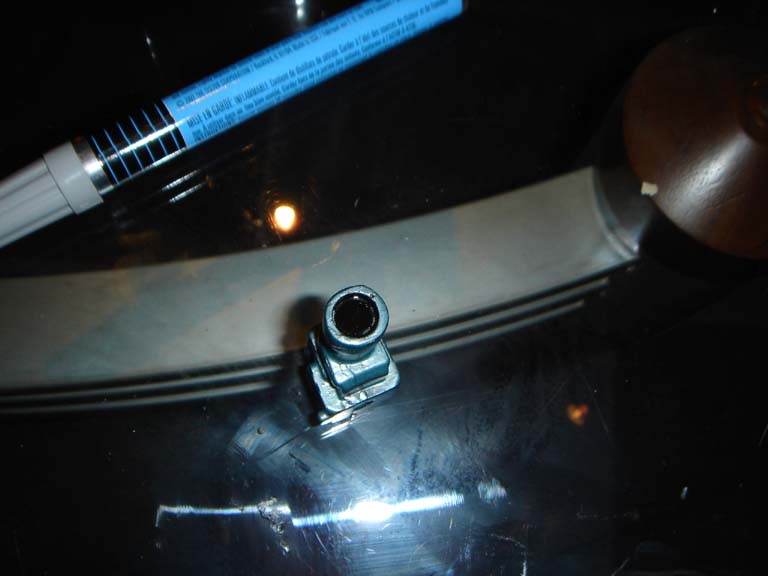
Paint
the barrel Flat Black. |
|
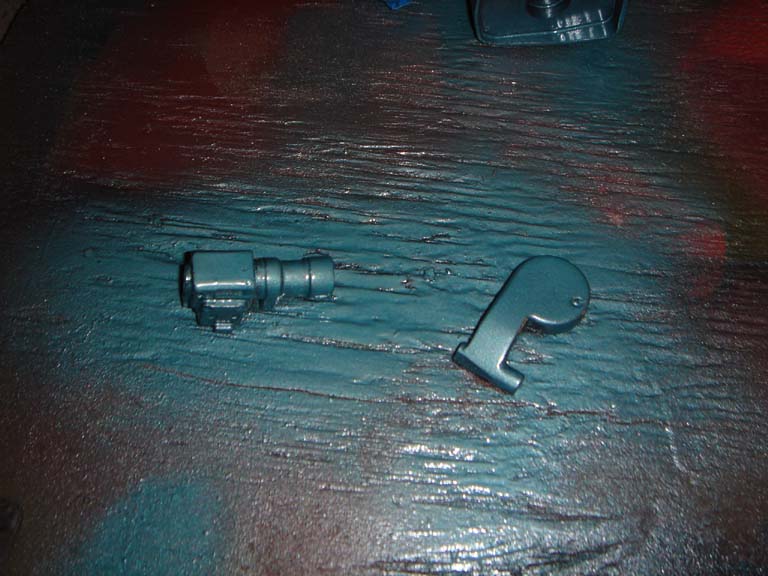
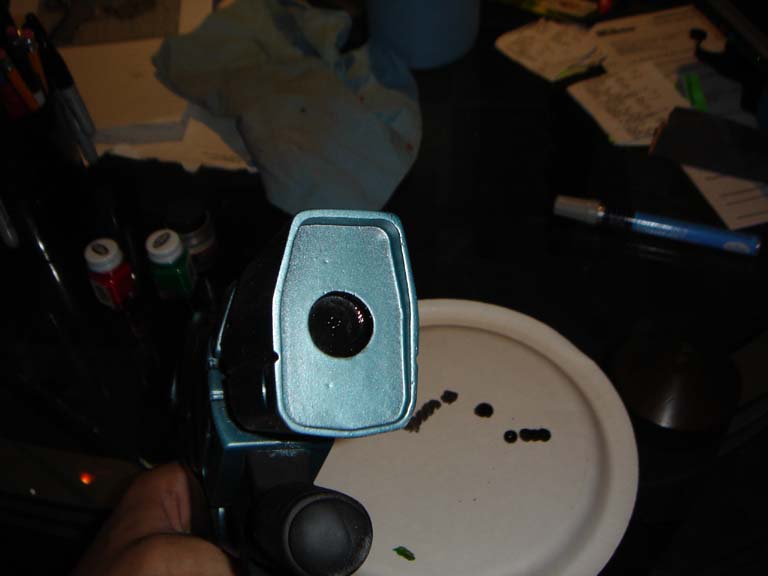
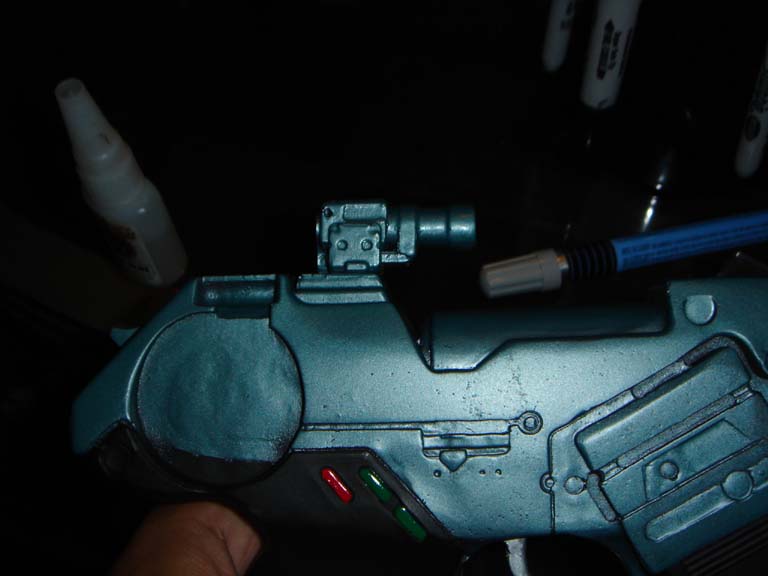
Paint
the Camera Lens Gloss Black. |
|
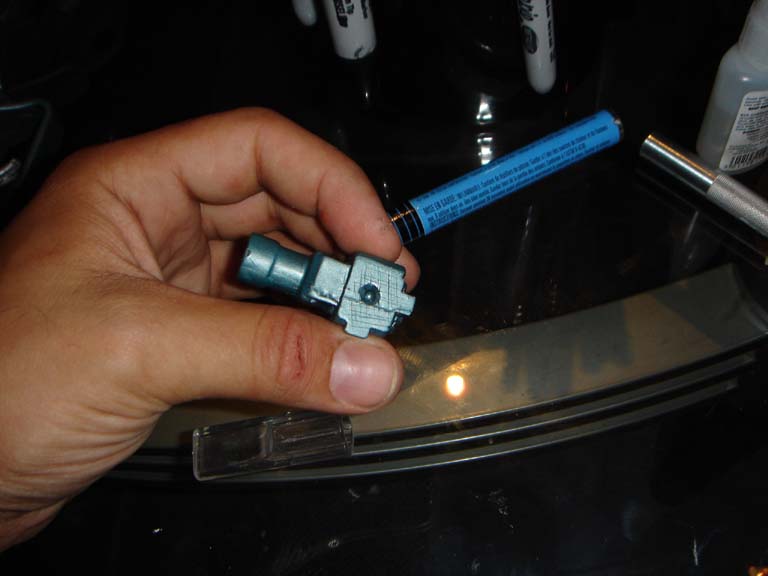
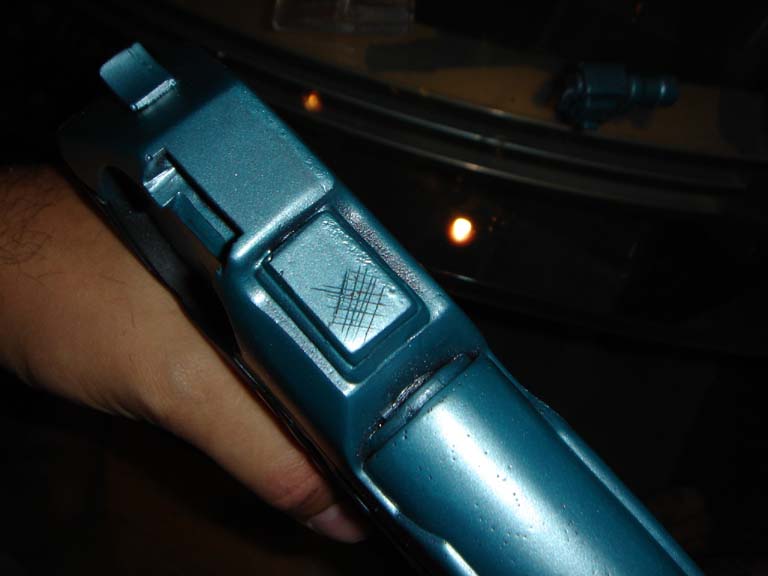
Score
the bottom of the Camera with an Hobby Knife to ensure that the
glue holds well. |
|
Score
the corresponding area on the Main Body as well. |
|
Glue
the Camera to the Main Body. |
|
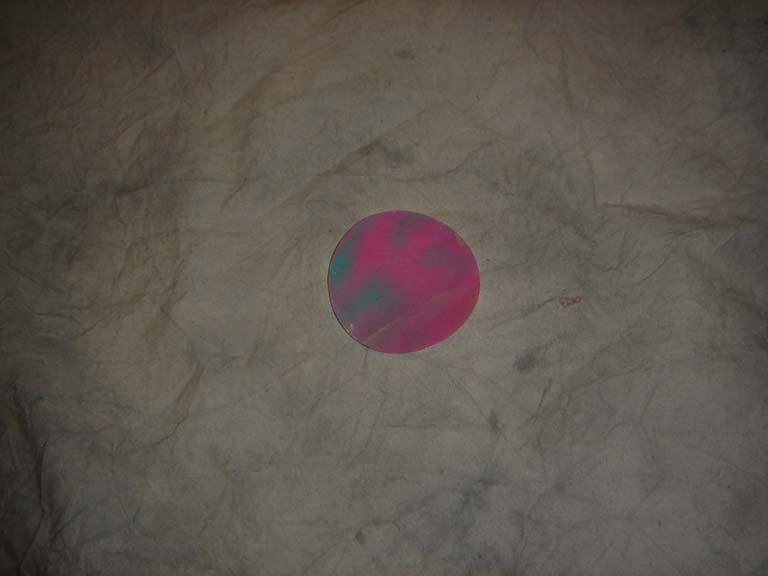
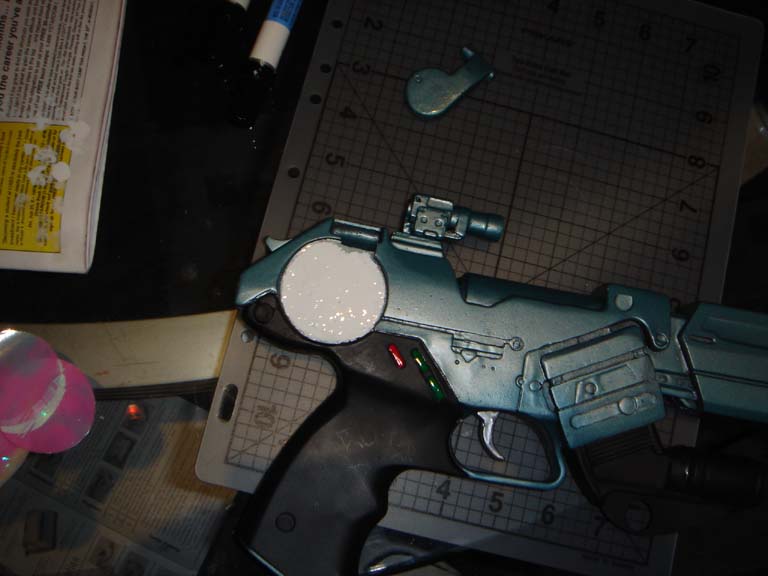
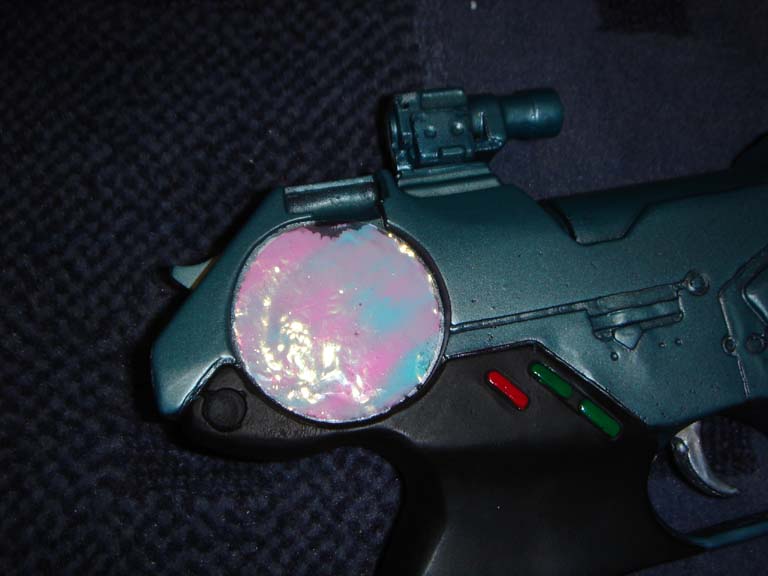
Paint
the Disk area Gloss White. Allow to thoroughly dry. |
|
Carefully attach the Mylar disk to the Disk area. Attach it slowly
to ensure there are no air bubbles. I've been looking for an actual
Disk that would fit this area, but have not been able to find one.
If anyone knows of a disk that is 1 3/4", please let me know!
|
|
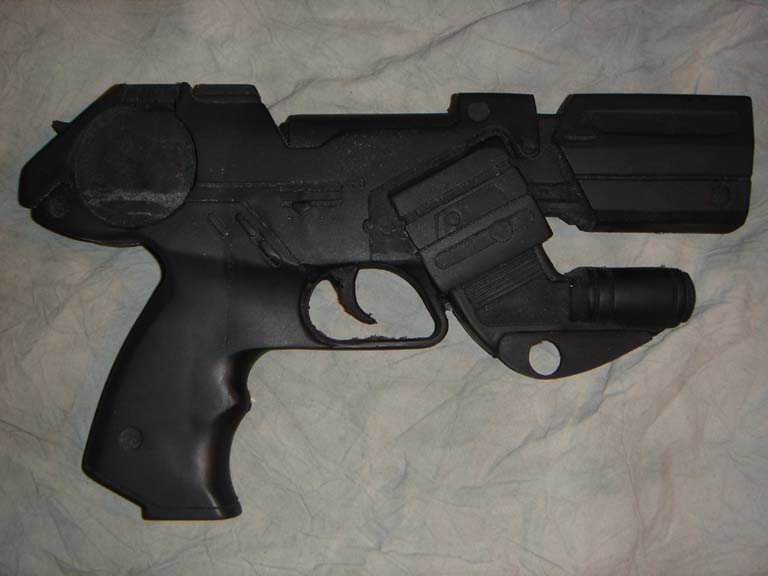
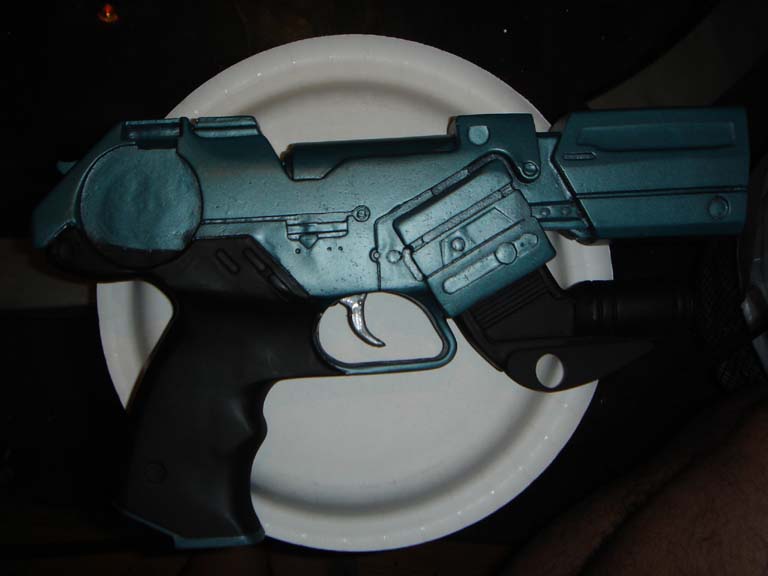
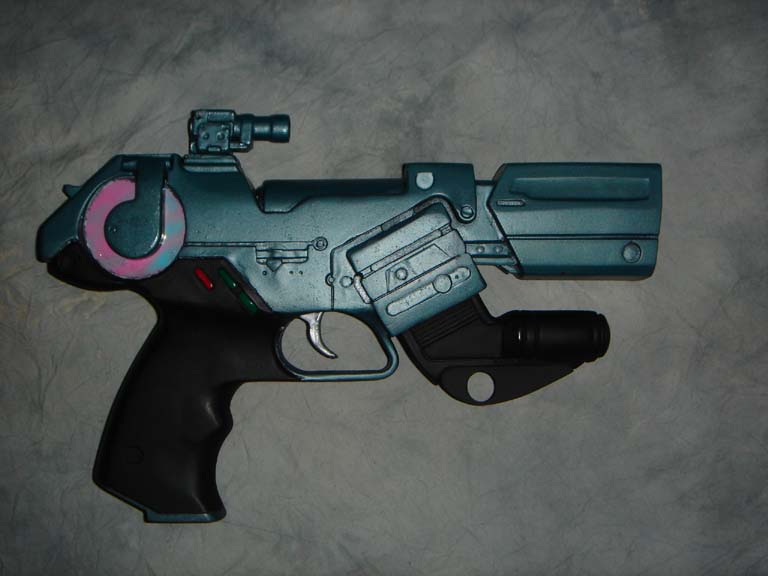
Finally,
glue the Disk Arm into place, and the kit is all finished! |
|
A
very simple resin kit that needs just a little clean-up and some paint
to make a very nice display piece for every Blade fan!
Cast
directly from an original prop used in Blade Trinity.
Payments
accepted are bank certified checks, money orders, and PayPal.
International
Shipping is available.
For
shipping prices, please use the checkout cart in the store,
it calculates the shipping costs for you prior to the payment being
due.
All
items are made to order at the time payment is made. Please expect 4-6
weeks for the items to be ready to ship.
Available
in the SpatCave Store.
Prices
subject to change without notice.